Thursday, November 18, 2010

Best present ever

Today's Christmas card features an adorable dog from Mo's Digital Pencil Too.
I coloured this digi image with Copics and then cut out him using a Spellbinders die. Then I lightly inked the edges of the frame with a Copic marker (R25) to help the panel stand out more against the busy background paper. The patterned paper itself has lots of glitter & glitz so I kept the embellishments to a minimum, just adding a stretchy Christmas'y ribbon along the top. The card is quite simple but I'm really quite pleased with my colouring job on the dog - I have lots to learn about shading but I think I managed to capture the ruffled softness of the fur.

This is a super short post today as I am tired after spending last night at a benefit dinner for "Feed the Future" (providing hot lunches to children over the summer months when school lunch programs aren't available. The food was good and the company enjoyable but the highlight of the evening was meeting Chef Michael Smith and hearing about his recent experience cooking for the 2010 Olympics up in Whistler. He had some great stories about the food preferences and special requests of the various Olympic athletes. And it doesn't hurt that he is a super nice guy who had all of the ladies in the room (excepting me, of course) drooling into their prime rib.
Have a wonderful day!

Challenges:
Totally Gorjuss - traditional Christmas colours
The Crafty Pad - Christmas sparkle (the paper & ribbon have sparkle/shine)


Monday, November 15, 2010

Everything in 3's

Lil Red Wagon's current challenge is to "do it in 3's". I took this challenge really to heart and made 3 cards with plenty of 3's.
These 3 cards were very quick & easy. First step was adhering the peel-off stickers to cardstock and colouring the images (using 3 Copic colours - R35, BG13, YG95). Next, I chose 3 background papers from the Basic Grey "Jovial" pack which I used for matting and the background panels. I love how this paper pack takes a non-traditional look at the green/red/blues of Christmas. And then I used 3 tools - an EK Success small scallop border punch (for either side of the central card), EK Success leaf punch (for embellishments on central card), and a Cuttlebug embossing folder (to emboss the white card-base).

I chose 2 sketches for my inspiration, one from Midnight Madness and the other from Mercy (oops, guess I should have used 3 to keep the theme of 3's going). The central card uses the Midnight Madness sketch. I cut each peel-off sticker image into a square and then matted them onto a lightly patterned paper. I used the border punch to create a partial frame on either side (keeping the left side much thinner than the right for added interest). When I added the matted images, I overlapped them slightly (as in the sketch) and then added some punched out leaves to fill in some of the white space and pull the images together.
The other 2 cards use Mercy's sketch. I cut around the two coloured images maintaining a narrow white outline to help them stand out. I attached them to the matted background panel using some pop dots. Then instead of a single ribbon I chose to use two thin ribbons adhered with a brad each. After pulling the cards together I decided they looked too plain so I added embossing to the white cardstock and it's hard to see but I also added some Glossy Accents to the red circles on the images to make them pop a bit more.
These were super fast cards but I like the end results. These just may end up being my go-to designs for this Christmas. After all, everyone can't have a super-special one-of-a-kind card - but don't tell them - LOL.

Challenges:
Lil Red Wagon - do it in 3's
Fab n Funky - going around in circles (the patterned papers is full of circles)
Challenge up your Life - blue & green
Paper Sundaes - use at least two: punches, ribbon, embossing, blue (hey, I used all four!)
Critter Sketch - texture (embossing, popped up panels, ribbon, stickers)


Sunday, November 14, 2010

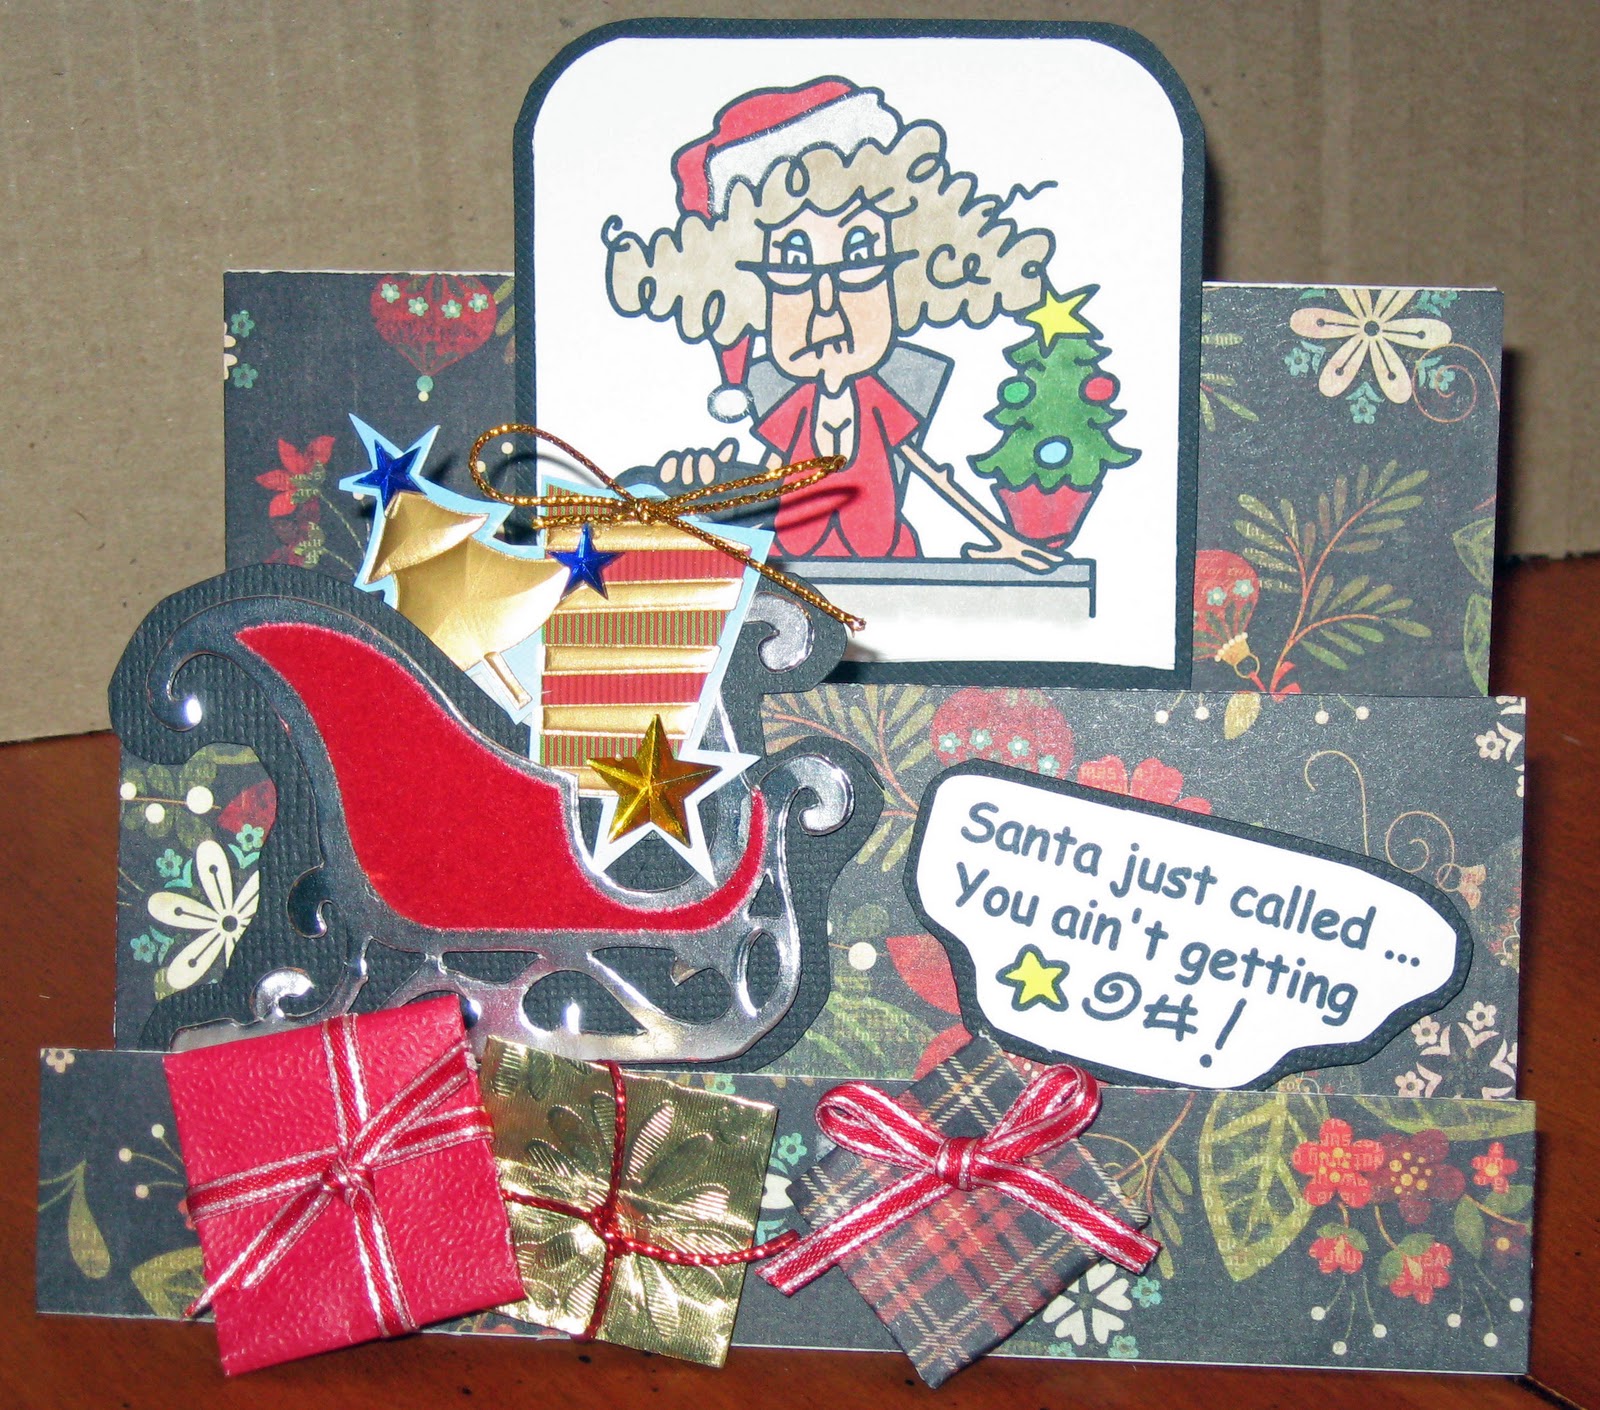
You ain't getting *@#!

Today's Christmas card is my favourite to date. I'm usually pretty critical of my projects but there are just so many things that I love about this one that you'll please forgive me while I gush a bit.

First, I love that I repurposed some of the elements (the sleigh and it's stack of presents were pulled from an old Christmas tag) and the presents stacked at the front are made from various scraps.

Second, I love how the stair step design gives so much opportunity to add detail and additional elements. And when folded up the last 2 lines of the sentiment are hidden which gives a little "surprise".

Third, I adore the contrast between the traditional paper (from Basic Grey) and embellishments and the modern digi (from Bugaboo).

And finally, I LOVE the attitude. What can I say, everytime I look at this digi & sentiment I just chuckle. Hope this gives you a little laugh too.

Challenges:
Creative Belli - something old (the sleigh), something new (the digi), something borrowed (my son's finger to hold the ribbon in place), something blue (the sparkly stars on the gifts)
Crazy 4 Challenges - Christmas
Creative Inspirations - Christmas
Stamp Something - use a digital (image & sentiment)
Top Tip Tuesday - use an image & sentiment

Saturday, November 13, 2010

Holly fairy

Sometimes the best cards are quite simple - this Christmas card is just an image, two papers, 1 ribbon and a few dewdrops.
The image is from Mo's Digital Pencil Too. I coloured her using my warm grey Copic markers and kept everything very neutral so that the holly wings would stand out. I'm not thrilled with the shading on the dress although I like the way the ruffles turned out. I have to challenge myself to add more shading - I am so often too conservative and the image just doesn't pop the way I want it too.

I cut the frame just a little small so that the dress and one wing would overlap the background - I see this as a pretty simple way to add some dimension to a project without making it bulky with too many layers. The papers are both from Basic Grey; I love how the whole card ends up feeling serene, even with the strong red.

Challenges:
Crazy Challenge - wings
Basic Grey Challenges - wings
Tuesday Morning Sketches - sketch (I rotated the sketch)
Cute Card Thursday - anything goes
Paper Sundaes - let it snow (it's subtle, but she is holding a snowglobe)

Friday, November 12, 2010

Carolling cats ... or is it caterwaulling cats?

I had the best afternoon yesterday! My sister-in-law Leslie had a group of us over to her place for an afternoon of Christmas card making. I was amazed at how well she had everything set up - there were stamping, cutting and glitter stations. There were snacks (yummy cookies!) and plenty of space. It was a productive afternoon as I finished 6 cards but I've decided to share just one or two a day so I don't overwhelm anyone. LOL.

This first card uses a Mo's Digital Pencil Too image that I just adore.
I coloured the image with Copic markers and then decided on the scalloped heart Spellbinders die to frame it - I like the way the heart is off-set, as if their "singing" has knocked the heart right off its axis. Best of all, I picked this heart set up at a garage sale over a year ago and this is the first time I've actually used it! I inked the edges of the heart with a marker and then adhered it with a few pop-dots. The paper has been in my stash for years as has the ribbon. I love when I'm able to use items that have been gathering dust! At first I had the ribbon going straight up & down but I ended up putting it on an angle to emphasize the placement of the heart.

This was a quick card to put together (although the colouring took quite a while, but I never count that since I just colour while watching TV) and I think I'll probably try to duplicate the layout a couple more times although with different cats, of course. Anyway, have a wonderful day and hope your ears aren't assaulted by any carollers quite yet.

Challenges:
Crazy 4 Challenges - square card
Pile it on - holiday card using an animal
ABC Challenge - "H"is for holiday
Digital Tuesday - use something you've never used before (the nestie)
Alphabet Challenge - "C" is for cats


Tuesday, November 9, 2010

Thankful for exciting news

I have to start today's post by announcing some very exciting news --- I've been chosen for the brand-new design team (sorry, make that deZign team) at Ezee Pzee. If you haven't heard of Ezee Pzee yet then you will soon - this is a new company making wonderful, high-quality, detailed chipboard shapes and albums. If you look through my blog you'll see some examples of the great product that is being developed. I'm so thrilled to be a part of this new company!

I wish I had a new Ezee Pzee project to share but unfortunately I haven't had time yet since I just got the news. Be assured that I will be working on some very soon. In the meantime, here is a Thanksgiving card that I put together using some freebies from Create with TLC and Digidrawn (on CDAC).  Here in Canada, Thanksgiving is long over but it's always good to be prepared.
TLC is currently sponsoring the colour challenge at CDAC so I had no problem settling on a colour scheme. Paulette kindly made a digi and sentiment available free for the challenge but I decided to use the scarecrow which I picked up from her awhile back. I have wanted to use him since first seeing him --- Isn't he just too adorable? I coloured him with Copics and then traced a frame behind him using a Quickutz cookie cutter die. I wanted it to look as if he was jumping off the page so purposely left his hands and hat top out of the frame.

Digidrawn is sponsoring another challenge on CDAC - this one is to use layers so I coloured two copies each of the pumpkins and corn images (these were also provided free for the challenge). I cut out the small pumpkin and layered it onto the pumpkin pile. In order to get a more rounded affect, I placed the cut piece upside down into the palm of my hand and then used an embossing tool to gently curl the sides in. I used Zip-dry glue to keep the shape. For the corn, I popped up one of the strips of husk.

As usual, I used Basic Grey papers and then finished off with some buttons from my stash. Oh, and I also swept a bit of distress ink along the edges of the frame and card-base to tone down the brightness of the white. I wish I had photographed the inside of the card because I used the free sentiment that TLC provided.

Challenges:
Off the Wall Craftiness - colour combo
Our Creative Corner - attitude of gratitude
Scrap, stamp & doodle - Fall
CDAC Challenge - colour, other theme
Copic Creations - use your browns and/or create a scene
Stamping Vacation - any shape frame except square or circle
Stamping Vacation - occasion oasis: Thanksgiving

Friday, November 5, 2010

Moving on ...

There must be something in the water because yet another co-worker is leaving. That makes 3 (out of our small group of 8) in the past month! For Brian's card, I chose to go with a homey feel; autumn'y shades, faux stitching, and a sock monkey. 
The image I chose is from Bugaboo and I coloured it using Copics. The paper I used has a bit of a grain to it which gave the coloured image a rougher look which I think works well with the distressing on the card. I cut the image out using a Spellbinders and then ink the edges with Antique Linen Distress Ink. The paper is from Basic Grey (a Christmas pack!) and I also inked the edges (just enough to make sure there is no white showing on the cut lines).

I used a chipboard speech bubble from Ezee Pzee Embellishments. Here is an enlargement so that you can see the detail. I painted the shape with Memory Makers Vanilla Latte paint and then lightly sponged Antique Linen distress ink over it to try and mimic the look of the cream in the patterned paper. I added the sentiment (and this was incredibly difficult for me) in my own handwriting - first with pencil and then with red ink. I chose not to erase the pencil because, again, I wanted to give it a softer, fuzzier feel.

The final touch were fauz stitches around the outside of the speech bubble (I was trying to make it look like it was stitched like the monkey) as well as some faux stitched lines on the patterned paper. The card design overall was based on a sketch from Sketch Saturday.

Thanks for looking and I'd love to hear any suggestions you might have to improve on this or any other project I post.

Challenges:
Sketch Saturday - sketch
Paper Sundaes - for a boy or man
The Crafty Pad - stitching
Papertake Weekly - for a boy or man
Lil Red Wagon - use some red (I think it's the red hat & buttons that make this pop)
Cards for Men - anything goes
Crafty Cardmakers - stitching